Make It
With a PDF Pack downloaded and ready to go it's time to Make the Game
Heroes of Feonora is a family board game that encourages player creativity from the very beginning ...in the way unique, individual characters are created, along with the many roleplaying opportunities found throughout the game. In the same way putting the game together offers plenty of creative opportunity. This page is for all the Crafting enthusiasts, innovative Makers and prospective players looking to put a working copy of the game together. Creating your own Heroes of Feonora board game can be a fun project in itself and hopefully everyone will pitch in. Ready to get started?
Let's start with one of the most important elements of a good game set, choosing the right paper...
Let's start with one of the most important elements of a good game set, choosing the right paper...
Paper Recommendations
Special paper is by no means required for a successful, working copy of the game. But it does go a long way toward enhancing the experience. Here is a short list of paper stock we've used over the years (for card decks).
- Wausau 80 lb Cover Exact Coated Matte Finish (Part No. 99421)
- NewPage 80 lb Cover Sterling Ultra Digital Matte Finish (Item No. 51752)
- Xerox 100 lb Digital Color Elite Silk coated (Item No. 3R11482)
For those not familiar with paper conventions the first tip is not to confuse "Index" with "Cover" stock. These are two common but different "grades" of paper and should not be compared side by side. The pound rating is a helpful indicator (a higher number means thicker paper) but becomes exceedingly confusing once you start comparing different grades. So, as a rule try to be looking for Cover stock that is somewhere in the vicinity of 80lb weight. Something with a matte or glossy finish will add to the price a bit but will make for higher quality cards in the end. The important thing is to be sure you're comfortable producing cards before moving on to the good paper.
Note: By this time everyone should have read the enclosed "Read me first" text file included in the PDF Pack
If a fancy Matte Finish is unavailable or too pricey any 80lb Cover should do the trick. Likewise, if you're just planning on a quick jaunt down to the local office supply store (which will have a more limited selection) then slightly lighter weight 67lb Cover will suffice. Another backup option - if you can find it - might be a 110lb Index. In fact, for the Story Maps we settled on a Legal size 110lb Index, just thick enough to print to both sides. Legal paper is 8½ x 14.
For Character Sheets a 90lb Index is a good weight, taking into account color, ink and lots of erasing of pencil marks.
Printing Suggestions |
For producing card decks at the local print center |
Printing at home can be a tricky affair. Sometimes it's easier to work with someone knowledgeable on a commercial printer. We have had consistently good experiences over the years with the friendly staff inside the Office Depot print centers. If they have a Xerox Color Printer that's also been the best machine for quality prints. One other thing that might be useful for some people is they have paper that will work quite well for cards ~ in case you don't have your own. Just mention that you want to print out these pdf files onto some of their Business Card paper stock. It will cost extra, but then you get the convenience of using only what you need (and not having to bring your own paper).
When it comes time for the actual printing there are two main settings that need to come into play. Most important is to set "Actual size" (front and back) so the cards can stretch out fully to their proper size. This is the setting that disregards the invisible page margins and that's a good thing. The other is related to the use of extra thick paper and, in our experience, usually needs to be set at the computer terminal and on the printer itself. Most of the time the staff will know. By setting the machine to "Coated 3" (or similar) it does a smoother job of pulling in those thick/heavy sheets of paper without getting jammed or suffering from any blurring effect. Sometimes this is one of those things that is unique from machine to machine but this should be a good starting point.
After a few test proofs they are usually very good about getting a solid print job for each deck and, in terms of cost expect something in the range of $16 to $30 per deck, depending on whether you have your own paper or use theirs.
Assembling the Game Board
The main Game Board (the town of Villageton) doesn't require any kind of special paper or printer. In fact, the example below is a photograph of a board we played with that was printed onto regular 8 1/2 x 11" paper from the very same PDFs included in the downloadable PDF Pack. The markings show the method we've used to assemble the eight sections. Applying them in order from one to eight is a matter of carefully overlaying each page, using the overlap that was built into each section. Once the sheets are pretty well lined up take a small piece of invisible tape and gently tap it down to anchor the pages in place. From there we recommend applying a few additional (small) pieces of tape rather than trying to use a single long piece, which can create more problems than it's worth.
To help protect alignment tap the pieces of tape gently into place as opposed to sliding a finger across.
To help protect alignment tap the pieces of tape gently into place as opposed to sliding a finger across.
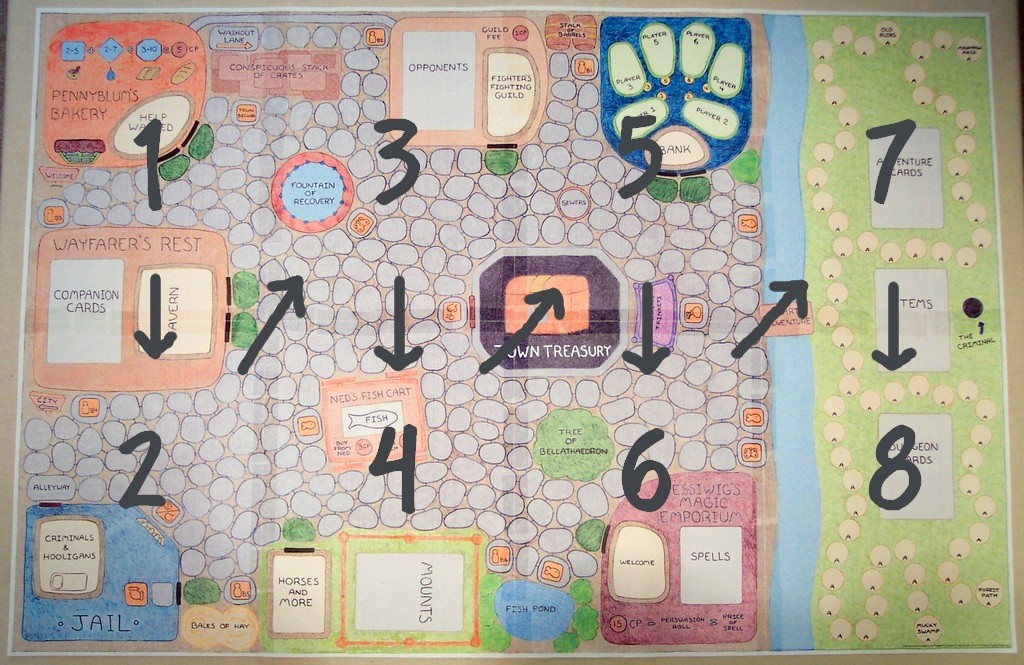
While the tape is visible, it becomes barely noticeable once the board is all set up and a game is in session. The main thing is getting the game to a playable state, and applying the tape to the front side of the paper makes it much easier to bring the pieces together. Tip: When cutting out the sections don't forget to leave the white outer border.
With the Game Board neatly pieced together the next thing we wan to do is start collecting components...
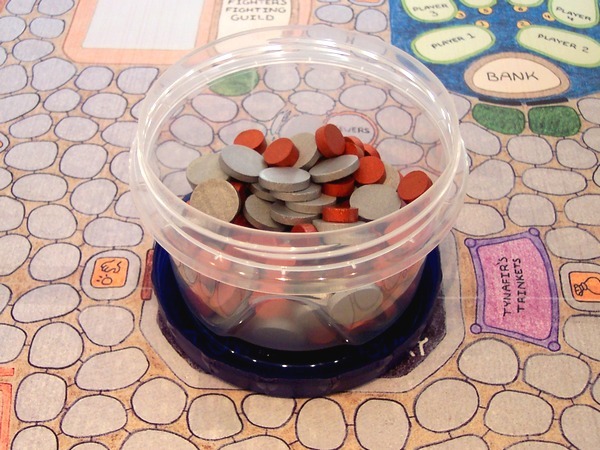
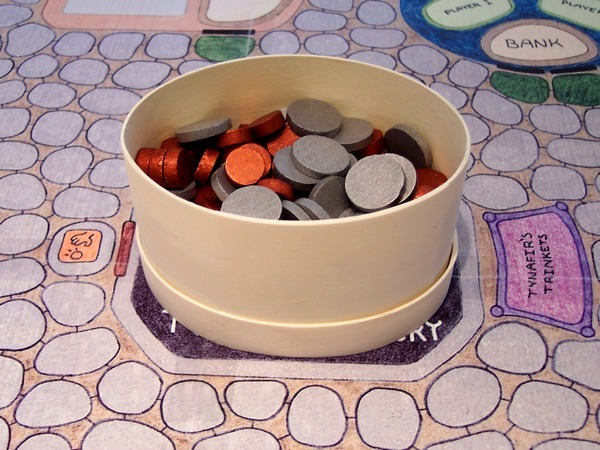
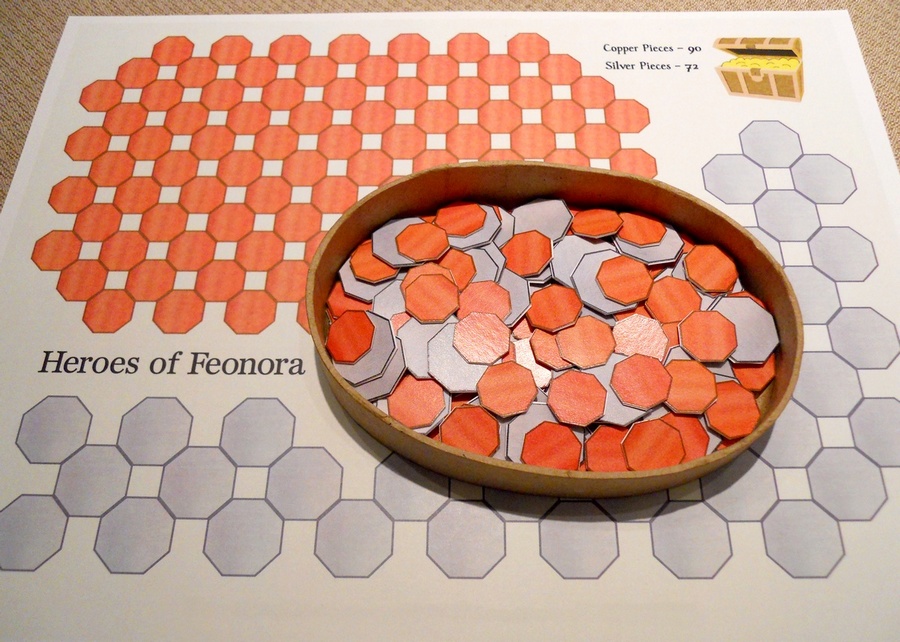
Town Treasury
The Town Treasury may be one of the easiest components to come up with. All that's needed is a simple container small enough to fit inside the reserved space (that is also easy to reach into). Here are a few suggestions.
Tip: Click on a thumbnail for a larger image and more information
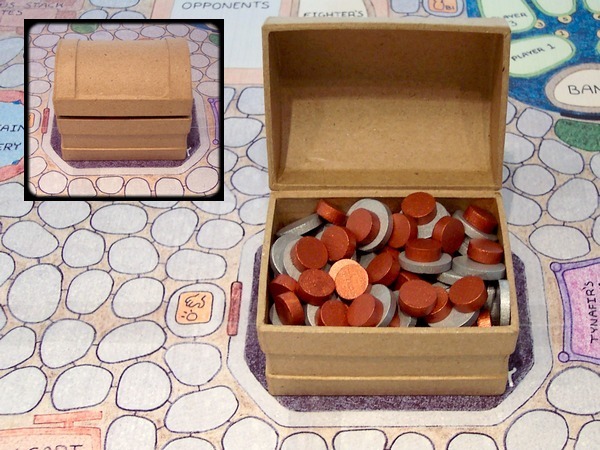
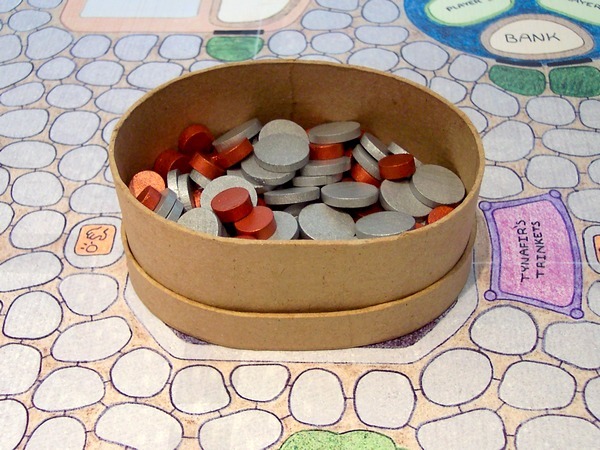
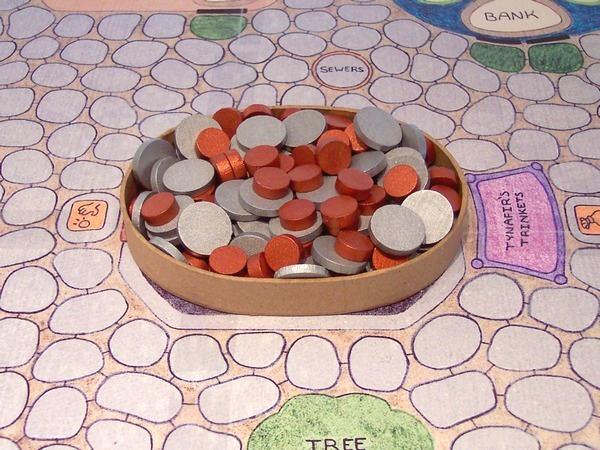
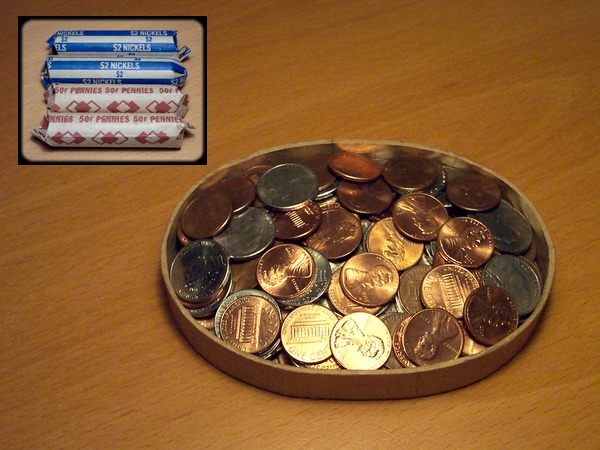
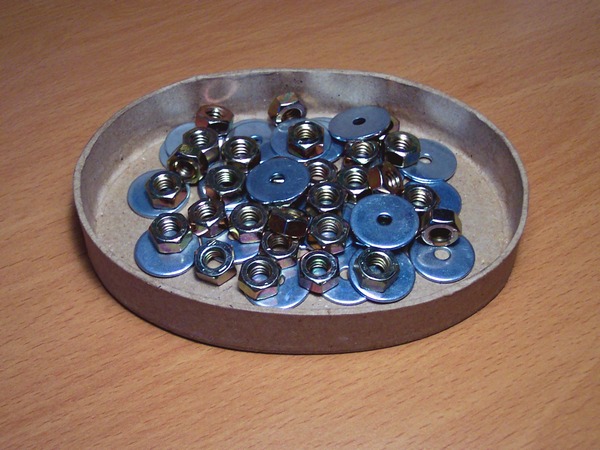
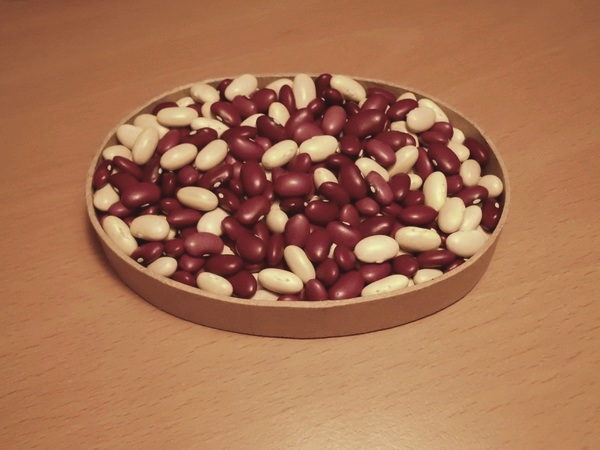
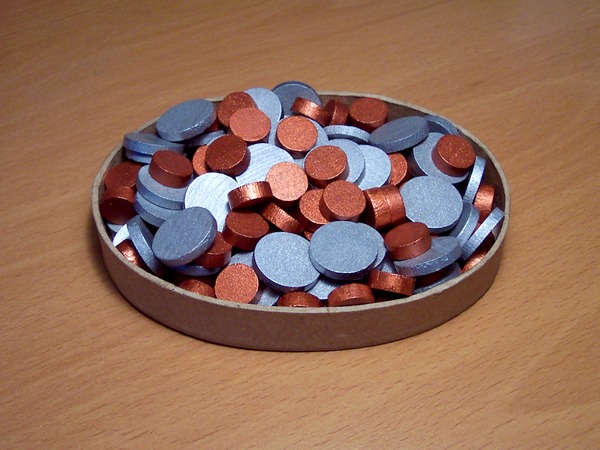
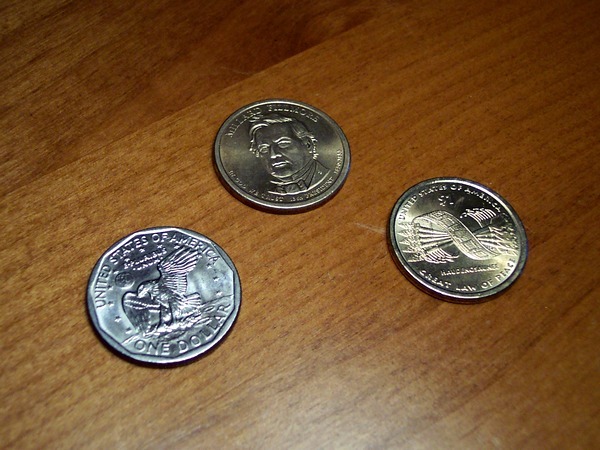
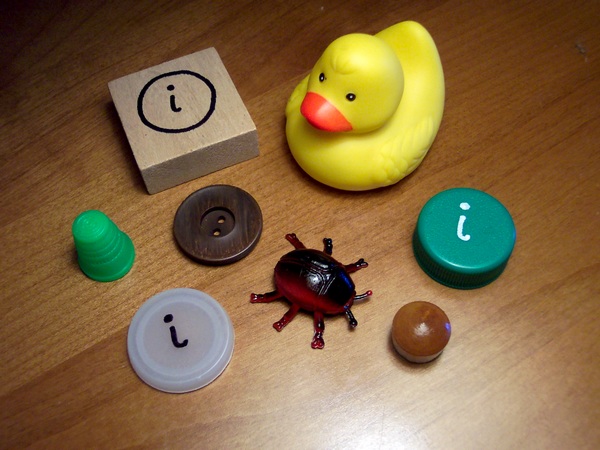
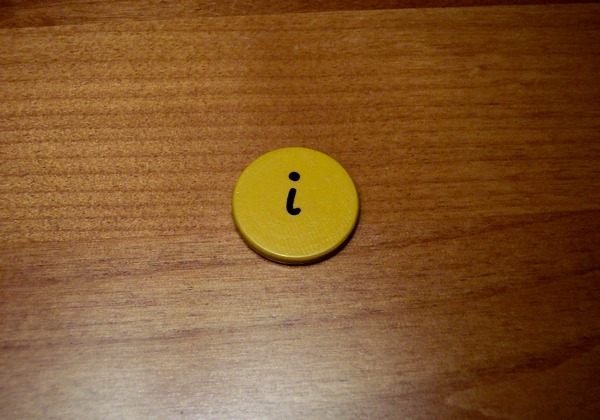
Copper and Silver Pieces
Since most of us don't happen to have real Copper and Silver Pieces laying about (or buried in a secret place on a remote Caribbean island) we'll have to come up with something else. Fortunately, there are plenty of things we can use that are probably already close at hand. Click on the first image; use arrow keys to navigate.
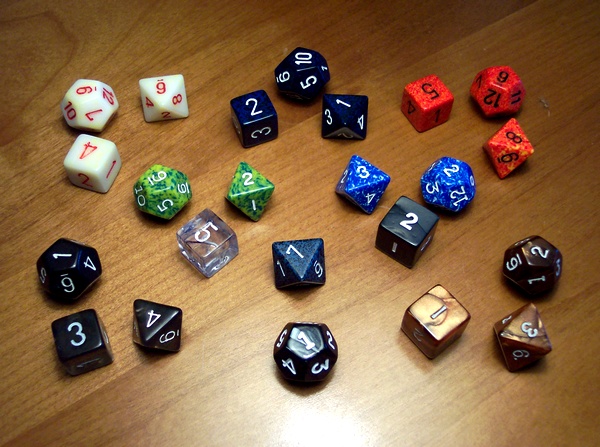
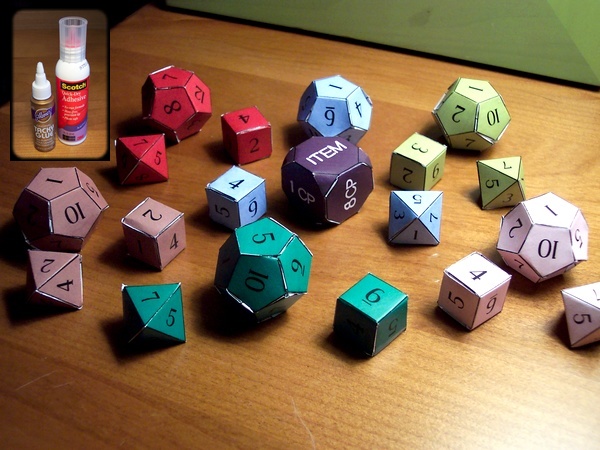
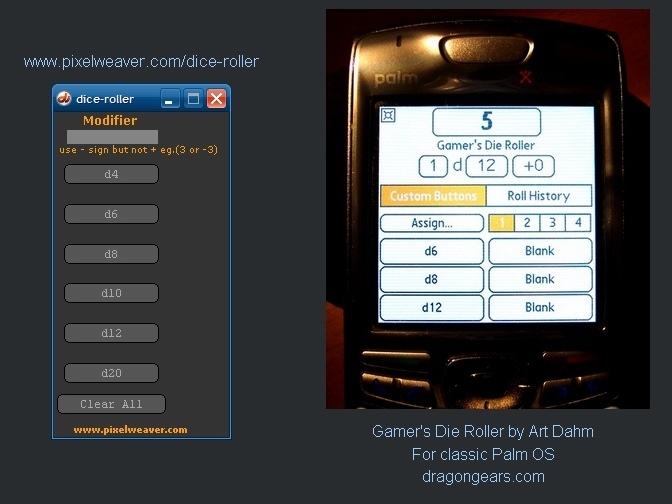
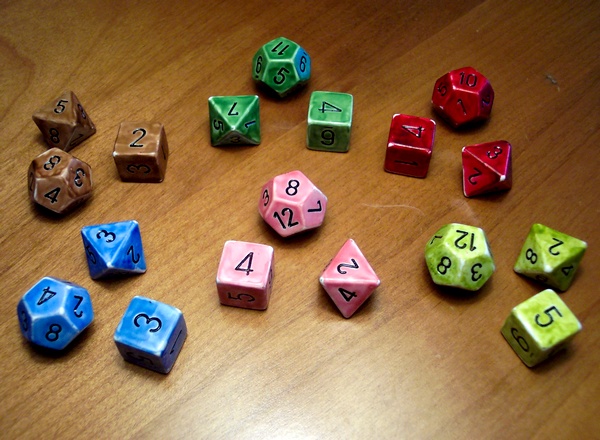
Player Dice
For players who are new to RPG-style games the most challenging component will likely be the Player Dice. These kinds of dice are known as "Polyhedral Dice" and are typically found at online stores or in local game shops. Polyhedral dice come in many shapes and sizes, ranging from simple four-sided (pyramid shaped) dice to grandiose 100 sided miniature boulders. But for Heroes of Feonora you will only need three types: Six-sided, Eight-sided and Twelve-sided. The proper way to refer to these are "d6" ... "d8" and "d12"
Tip: Be sure to read the captions for detailed information. Click on the first image (use arrows keys for navigation)
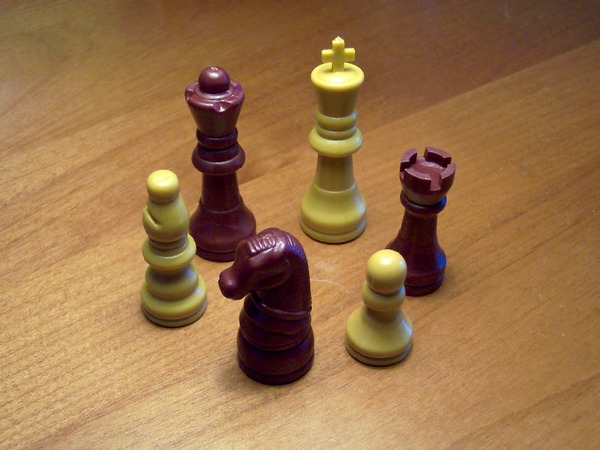
Player Figurines
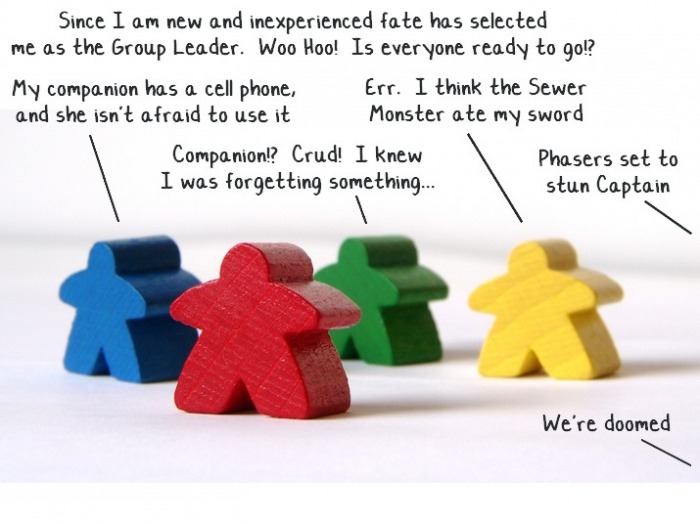
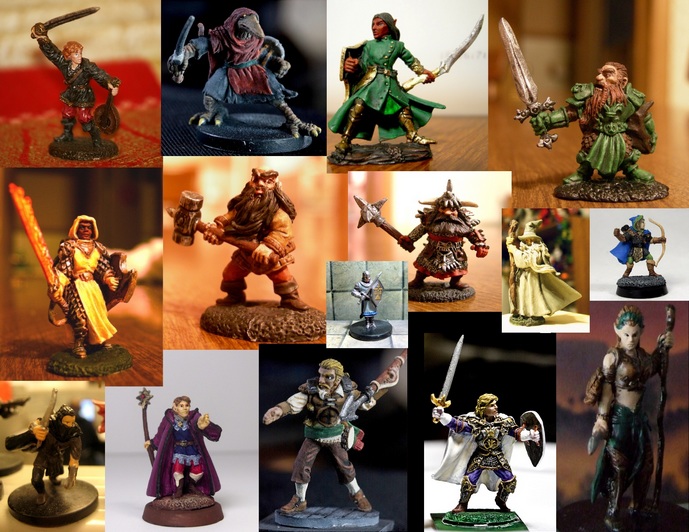
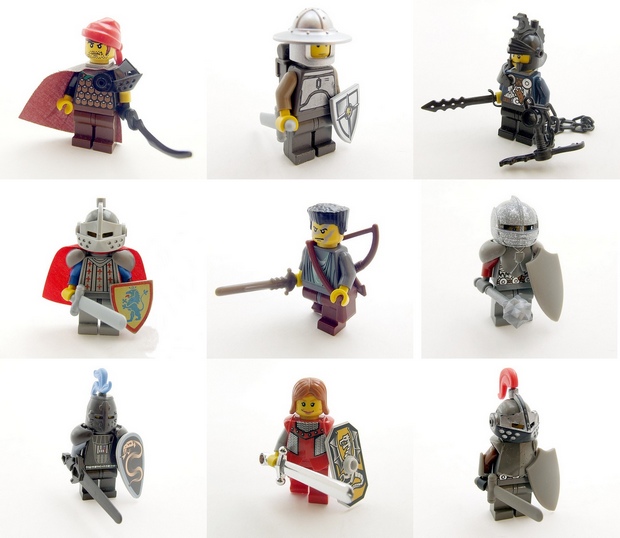
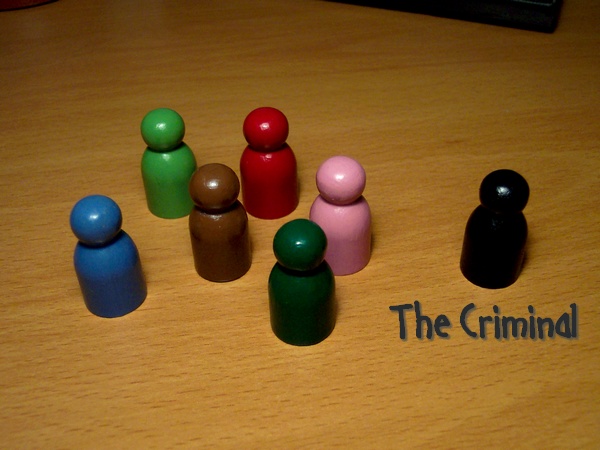
With endless possibilities for custom Player Characters that leaves us with a lot of flexibility in choosing figurines.
For those who may already have a collection of fantasy miniatures, you might create a character based on a favorite. Otherwise figurines can be something entirely simple, there to represent a character who comes to life more fully on the Character Sheet. In this case it's just a matter of finding something usable...which can be a wide variety of things.
For those who may already have a collection of fantasy miniatures, you might create a character based on a favorite. Otherwise figurines can be something entirely simple, there to represent a character who comes to life more fully on the Character Sheet. In this case it's just a matter of finding something usable...which can be a wide variety of things.
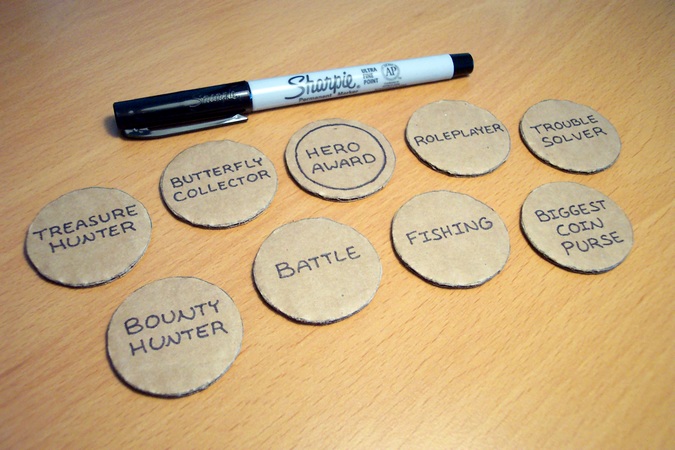
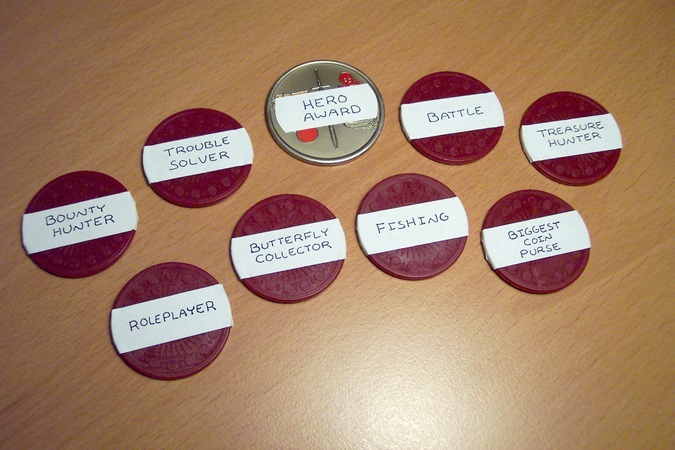
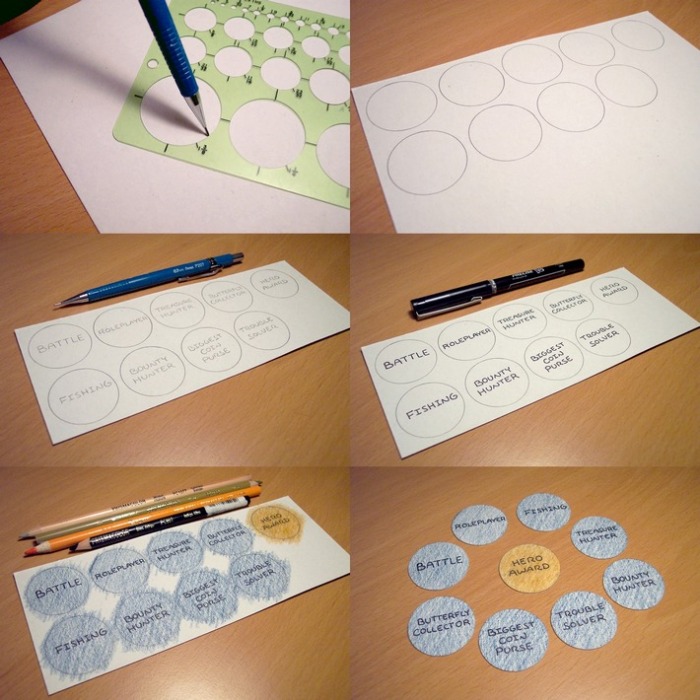
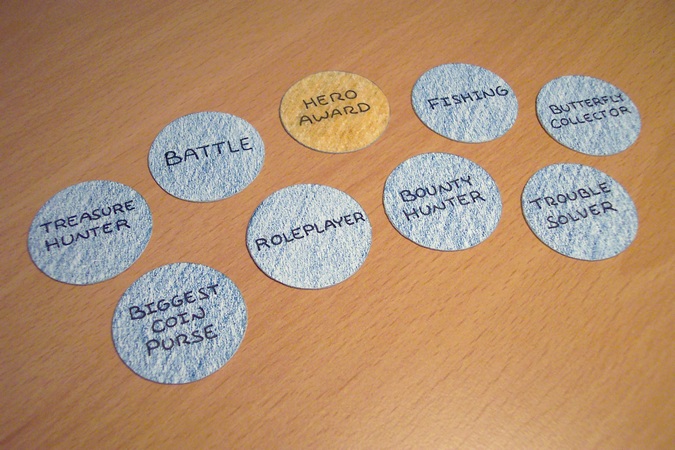
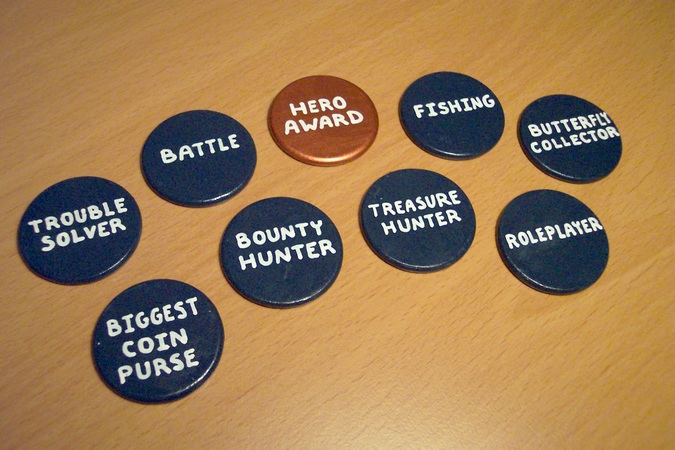
Victory Badges
During the game Victory Badges are one of the most sought after rewards for a job well done. They can be made easily using a few simple supplies, or turned into a mini craft project. The choice is entirely yours. Here are just a few examples of how to put together a set of Victory Badges (and Hero Award) using household stuff or crafting supplies.
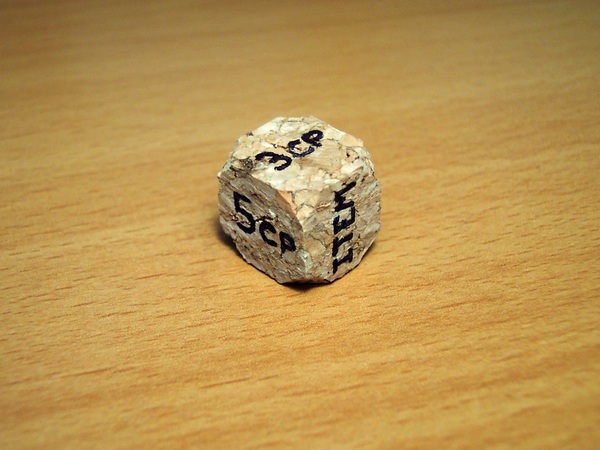
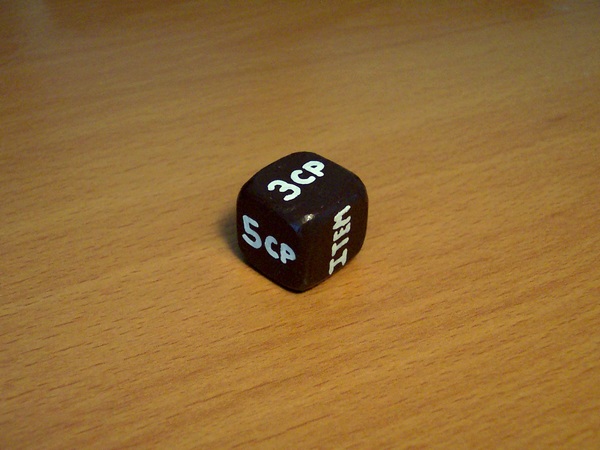
Loot die
During a hostile encounter whoever defeats the foe gets to roll for loot. What will the prize be? A single Copper Piece? A handful of Copper Pieces? An Item? Or, perhaps nothing at all. Making this determination is the ever present loot die (used also for Treasure Hunting). Here are a few ideas for making a Loot die of your very own.


Initiative Token
During the Combat rotation everyone gets a chance to attack, after which we return to the Card Pulling rotation.
The Initiative Token helps us stay on top of this. Here are a few ideas for a simple, homemade Initiative Token.
The Initiative Token helps us stay on top of this. Here are a few ideas for a simple, homemade Initiative Token.


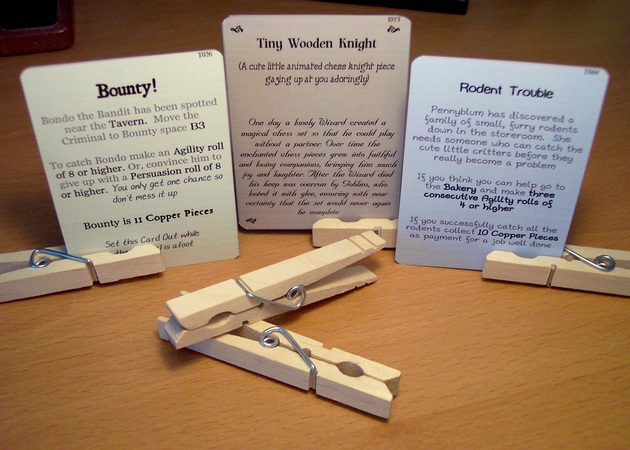
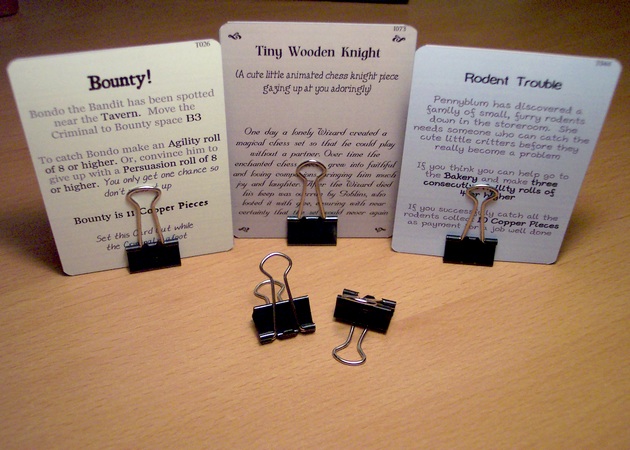
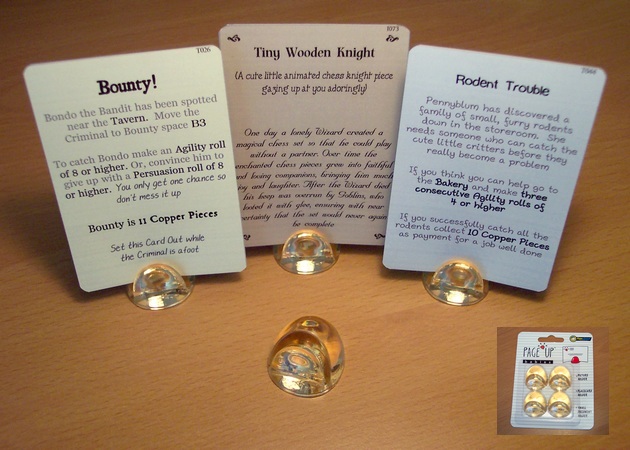
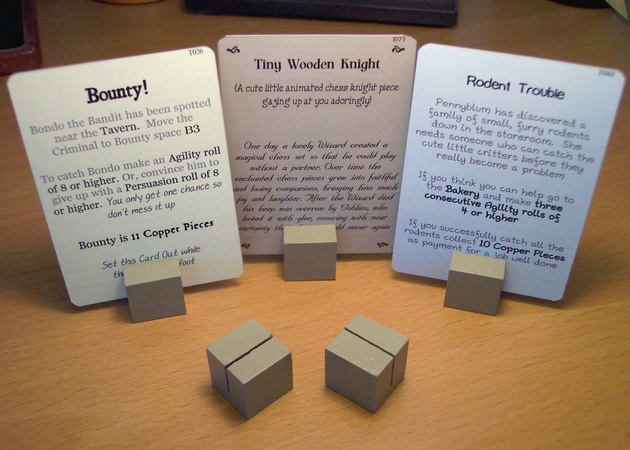
Card Stands
Card Stands aren't actually required in order to play the game but they can help make Town Time run more smoothly.
Certain types of cards come out during Town Time, such as Bounties and Troubles, that stay out and 'active' until someone comes along to tackle the task. With a Card Stand the card is easier to see and a little more out of the way.
Certain types of cards come out during Town Time, such as Bounties and Troubles, that stay out and 'active' until someone comes along to tackle the task. With a Card Stand the card is easier to see and a little more out of the way.

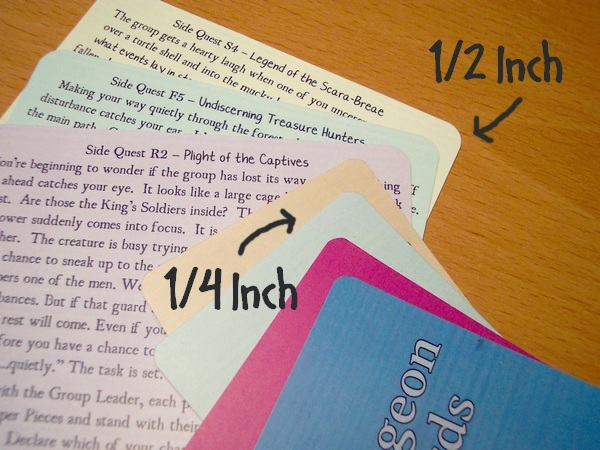
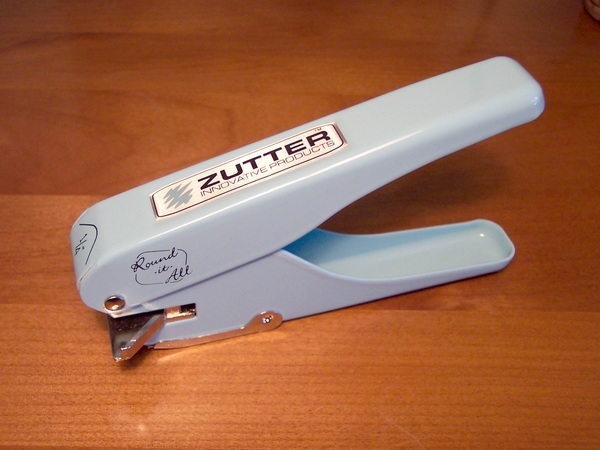
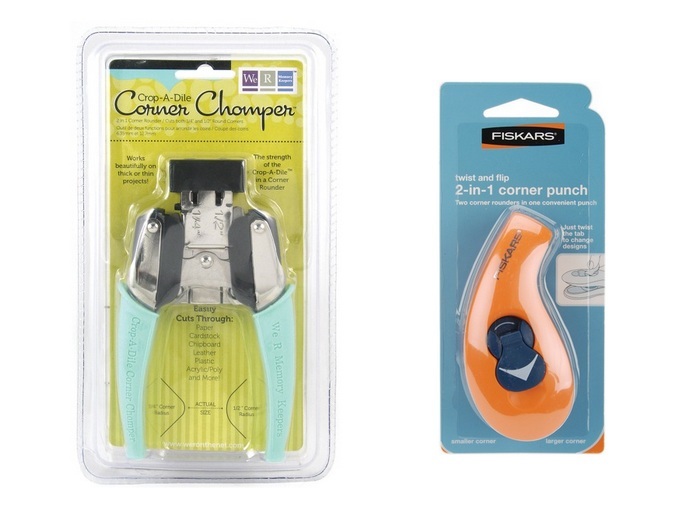
Corner Rounders
To give our game sets a more polished look & feel we'll want to round off the corners on all the card decks. This also makes the cards a little easier to handle. It turns out there is a surprising variety of Corner Rounders to be found out there and these helpful little tools can sometimes handle several cards at once. The two most universally used sizes for corner rounding are 1/2" and 1/4". For the regular card decks you'll want to use a 1/4" corner punch.
Story Maps
The journey phase of the adventure takes place on Story Maps. Out in the wild lands our daring heroes will face numerous encounters - friendly and hostile. There will even be an occasional opportunity for Treasure Hunting and Side Quests. Each of the fourteen Story Maps has been formatted to print to standard Legal size (8 1/2 x 14) paper. You'll notice inside the PDF Pack that the Story Maps are broken into two groups, Side A and Side B. The purpose behind this is so that if thick enough paper is used they can be printed to front and back, making seven double-sided maps instead of fourteen single-sided ones. Revisit the top of the page for paper weight recommendations.


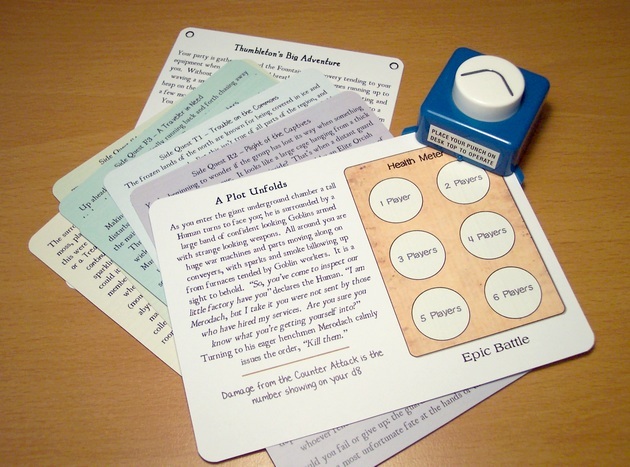
Game Manuals
The PDF Pack includes two versions of the 3 Game Manuals, the traditional 'Booklet' versions and the specially modified 'Flat' versions. Notice that the 'Flat' versions have been reformatted to work with a regular stapler. They aren't as glamorous as booklets (with a vellum cover) but they're functional enough to get things going and all the content is the same.
The important thing with Game Manuals is knowing how to print to the front and back of the paper using the old fashioned method of Manual Duplexing. This fairly simple procedure is covered in the Read Me First text file
|
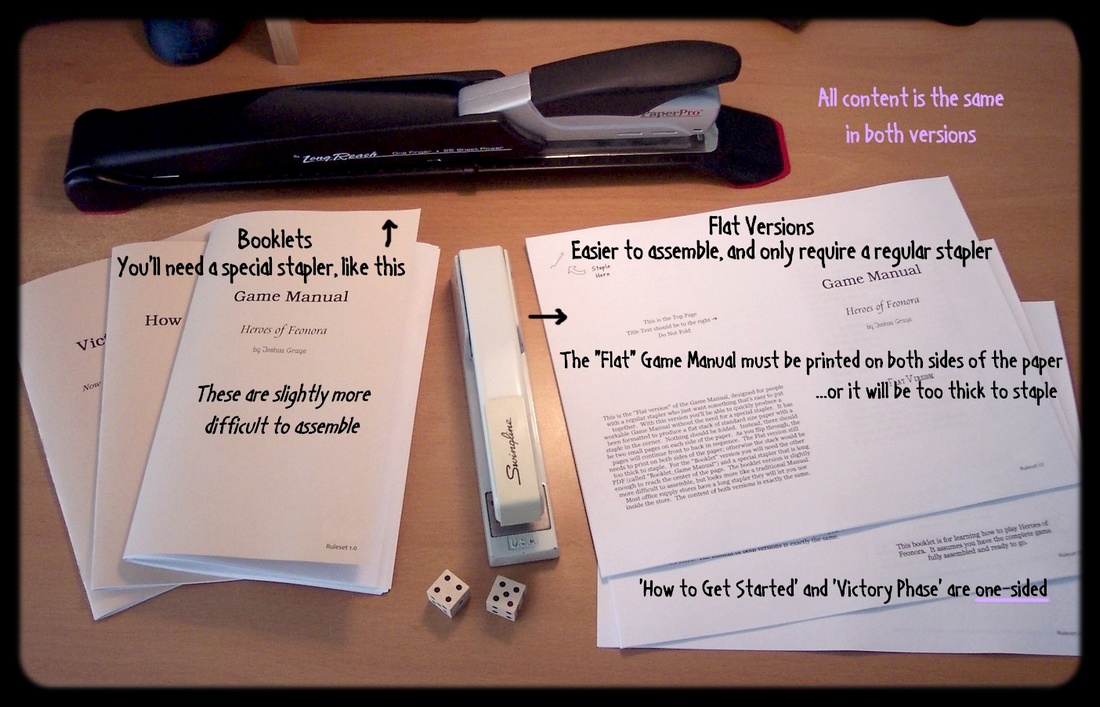
Check your local mail center/office supply for a long stapler. They usually have one available for customers to use. Just don't forget to bring the printed booklets.
|

Slug Copyright © Tony Martin
|